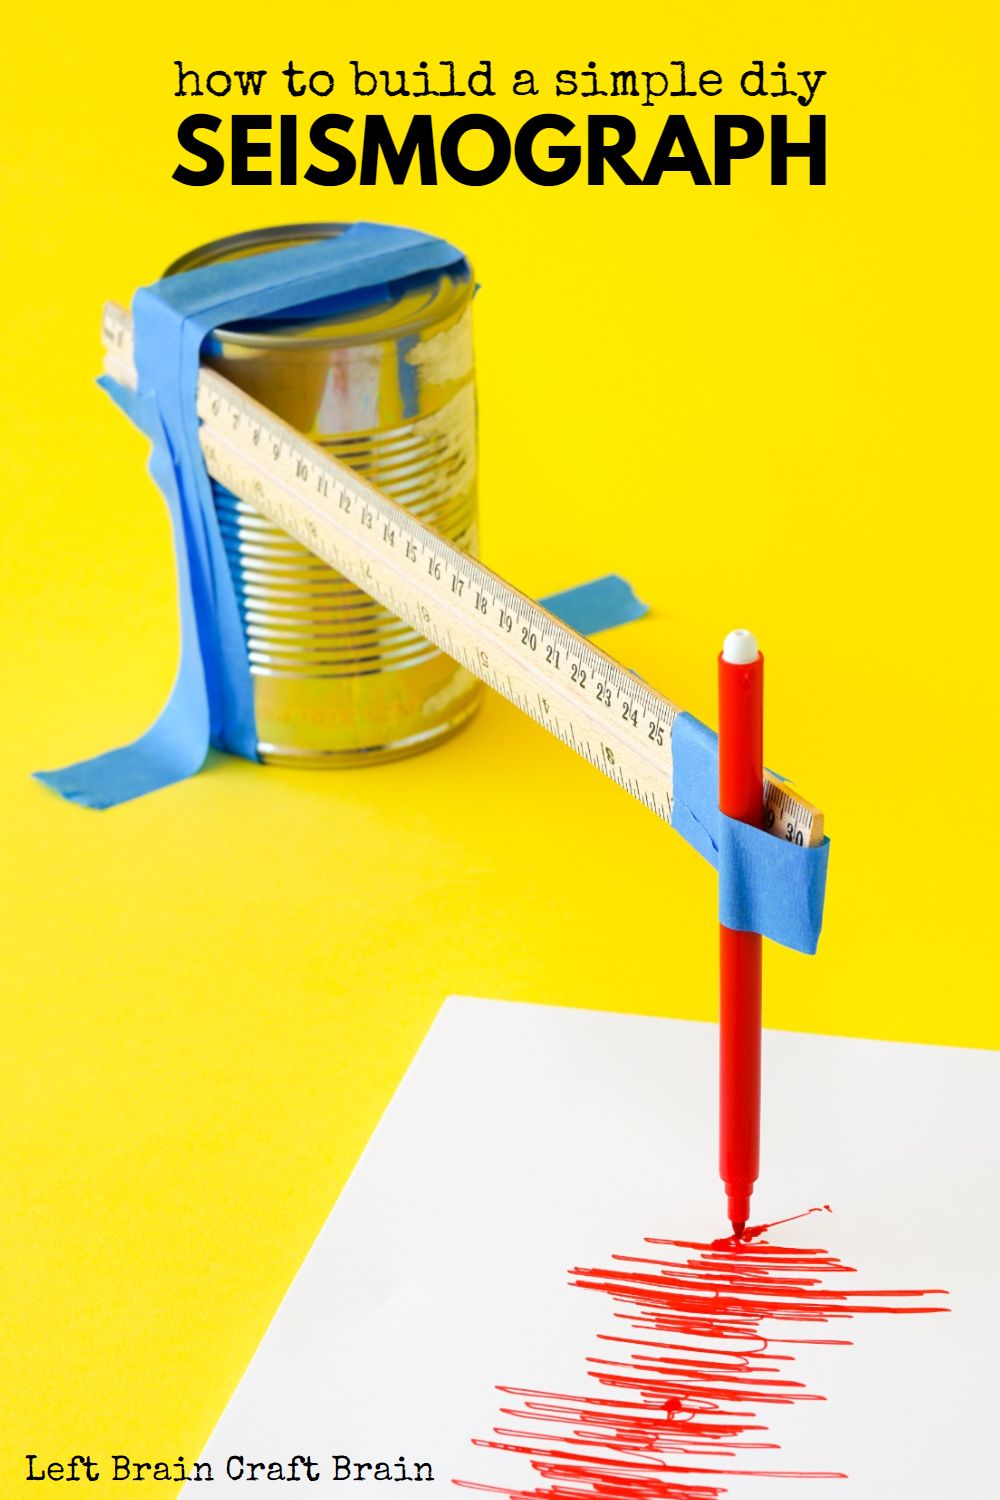
Give your day a shake by building your own DIY seismograph. This simple machine build teaches kids about earthquakes and how they are measured and only needs some simple materials you have on hand. This STEM project is a great way to teach the science behind world events, too.

What is an Earthquake?
Earthquakes are a fascinating natural phenomenon that happens around the world. They are shaking of the Earth’ surface when there is a sudden release of energy in the Earth’s crust and upper mantle. Earthquakes range from a gentle shake that can only be observed by machines to extreme shaking that causes severe damage to buildings, roads, and other structures.
What Causes Earthquakes?
An earthquake is caused by a sudden slip on a crack in the Earth’s surface called a fault. When two tectonic plates (large pieces of rock that make up the planet’s crust) rub against each other, they stick a little. This builds up pressure and when the plates finally break free, energy is released and an earthquake happens.
Where Do Earthquakes Happen?
Earthquakes can happen anywhere, but there are parts of the Earth that see a higher frequency of quakes. The “Ring of Fire” along the rim of the Pacific Ocean feels 90% of the world’s earthquakes. This area is at the border of two oceanic tectonic plates that are sinking below each other.
How are Earthquakes Measured?
A seismograph is an instrument used to detect earthquakes. They measure the movement of the ground and are installed around the world to record seismic events. It consists of an instrument that is stuck on the Earth’s surface that shakes when the Earth shakes except for a mass on a spring that stays in the same place due to inertia. The instrument records the difference between the movement of the mass and the instrument.
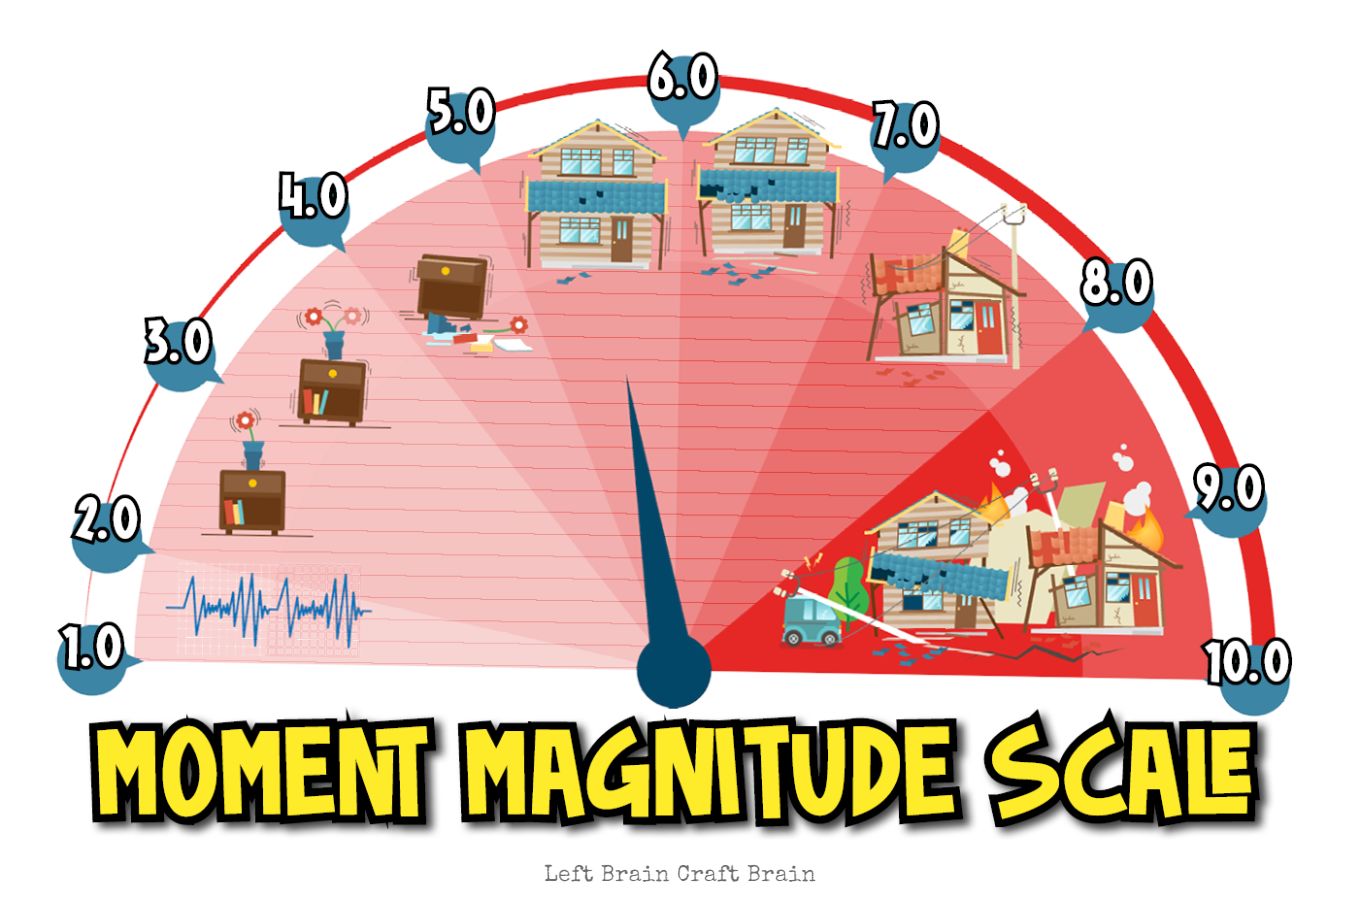
On a seismograph, the size of the line records the amount the ground moved. This is then converted to an earthquake magnitude. Magnitude is measured on the Moment Magnitude Scale. Magnitude is measured on a logarithmic base ten scale. For example, a 5.0 earthquake is 10 times as big as a 4.0 earthquake.
Want to see how the ground is shaking in your area? Check out the USGS’s (United States Geological Survey) interactive world map of earthquakes.
Simple DIY Seismograph Supplies Needed
This simple DIY seismograph uses supplies you can easily find at home.
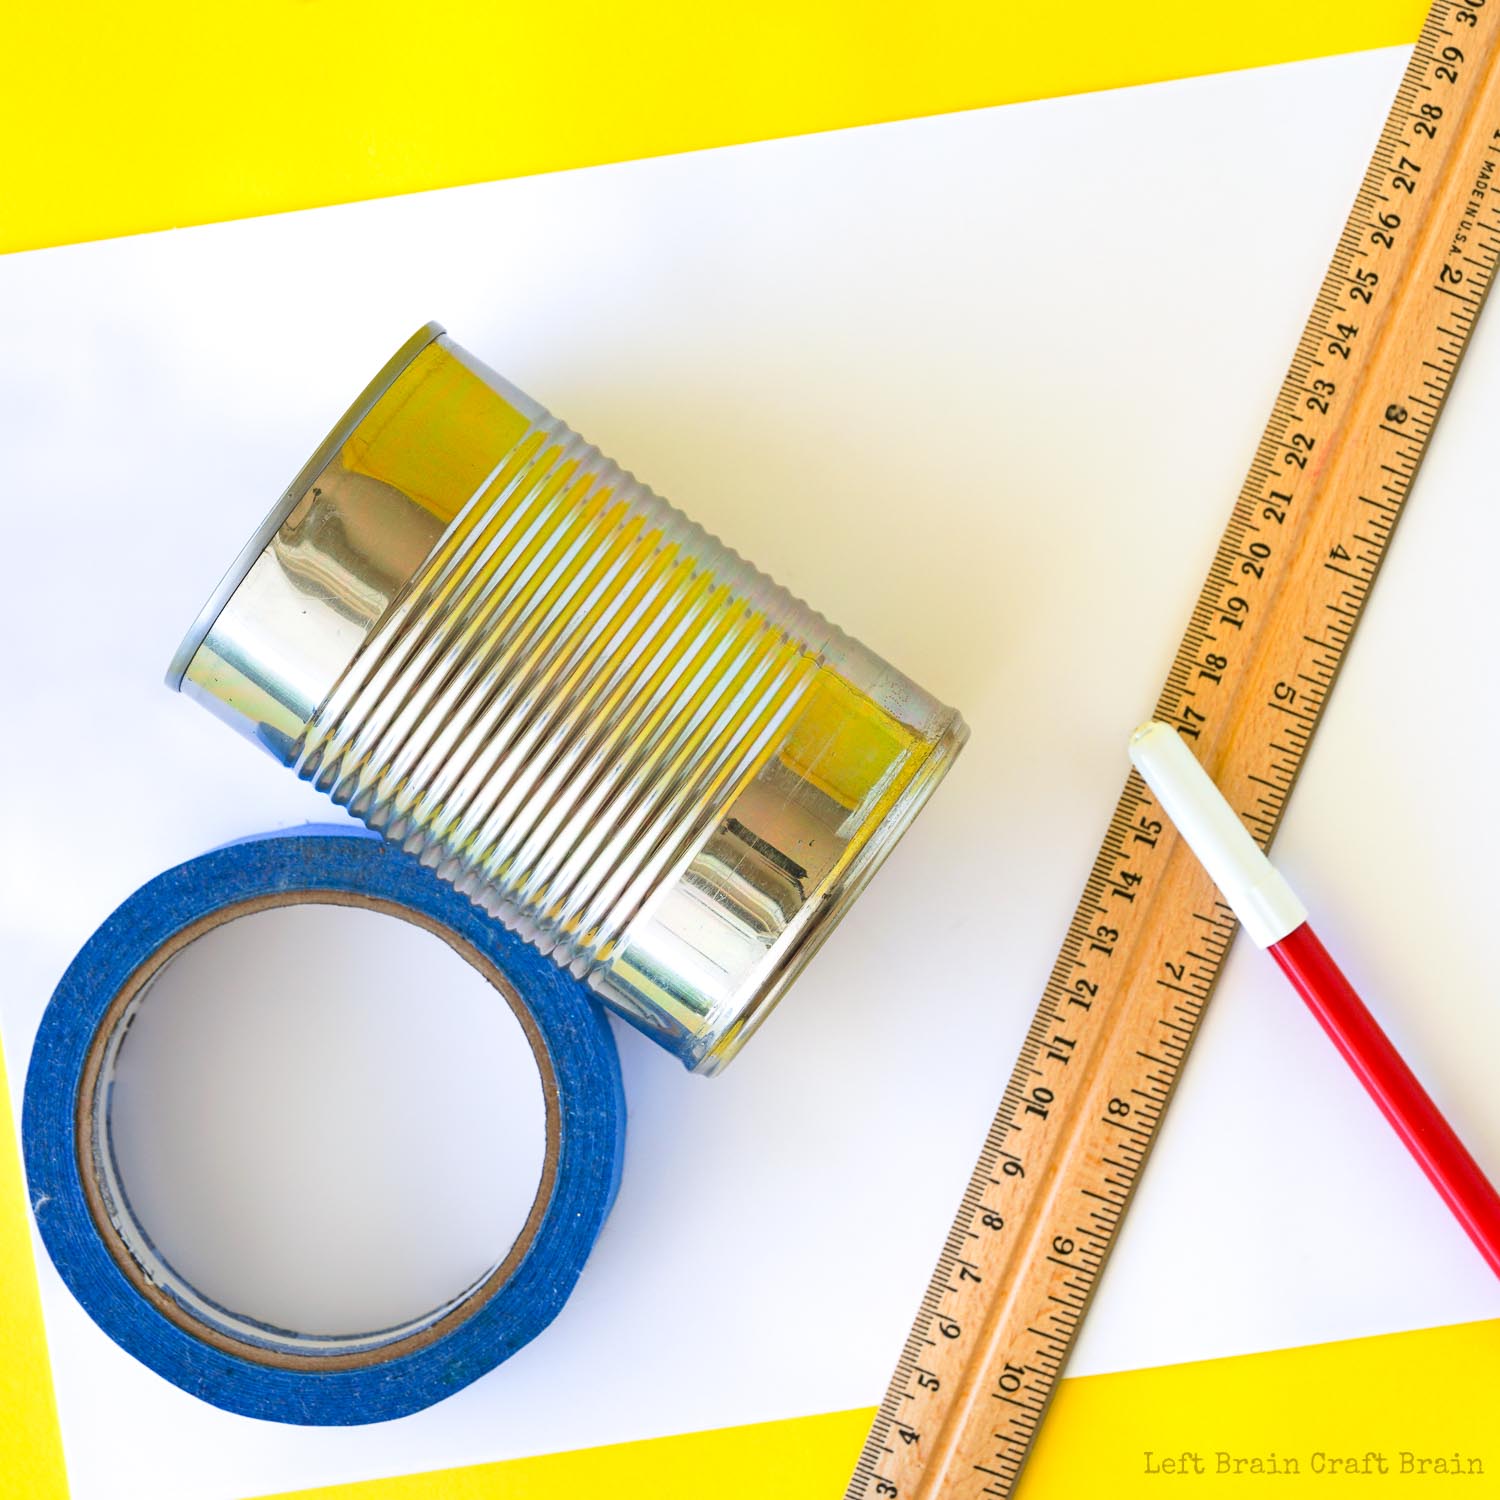
- Full food can
- Masking tape
- Ruler
- Thin marker
- Paper
How to Build the DIY Seismograph
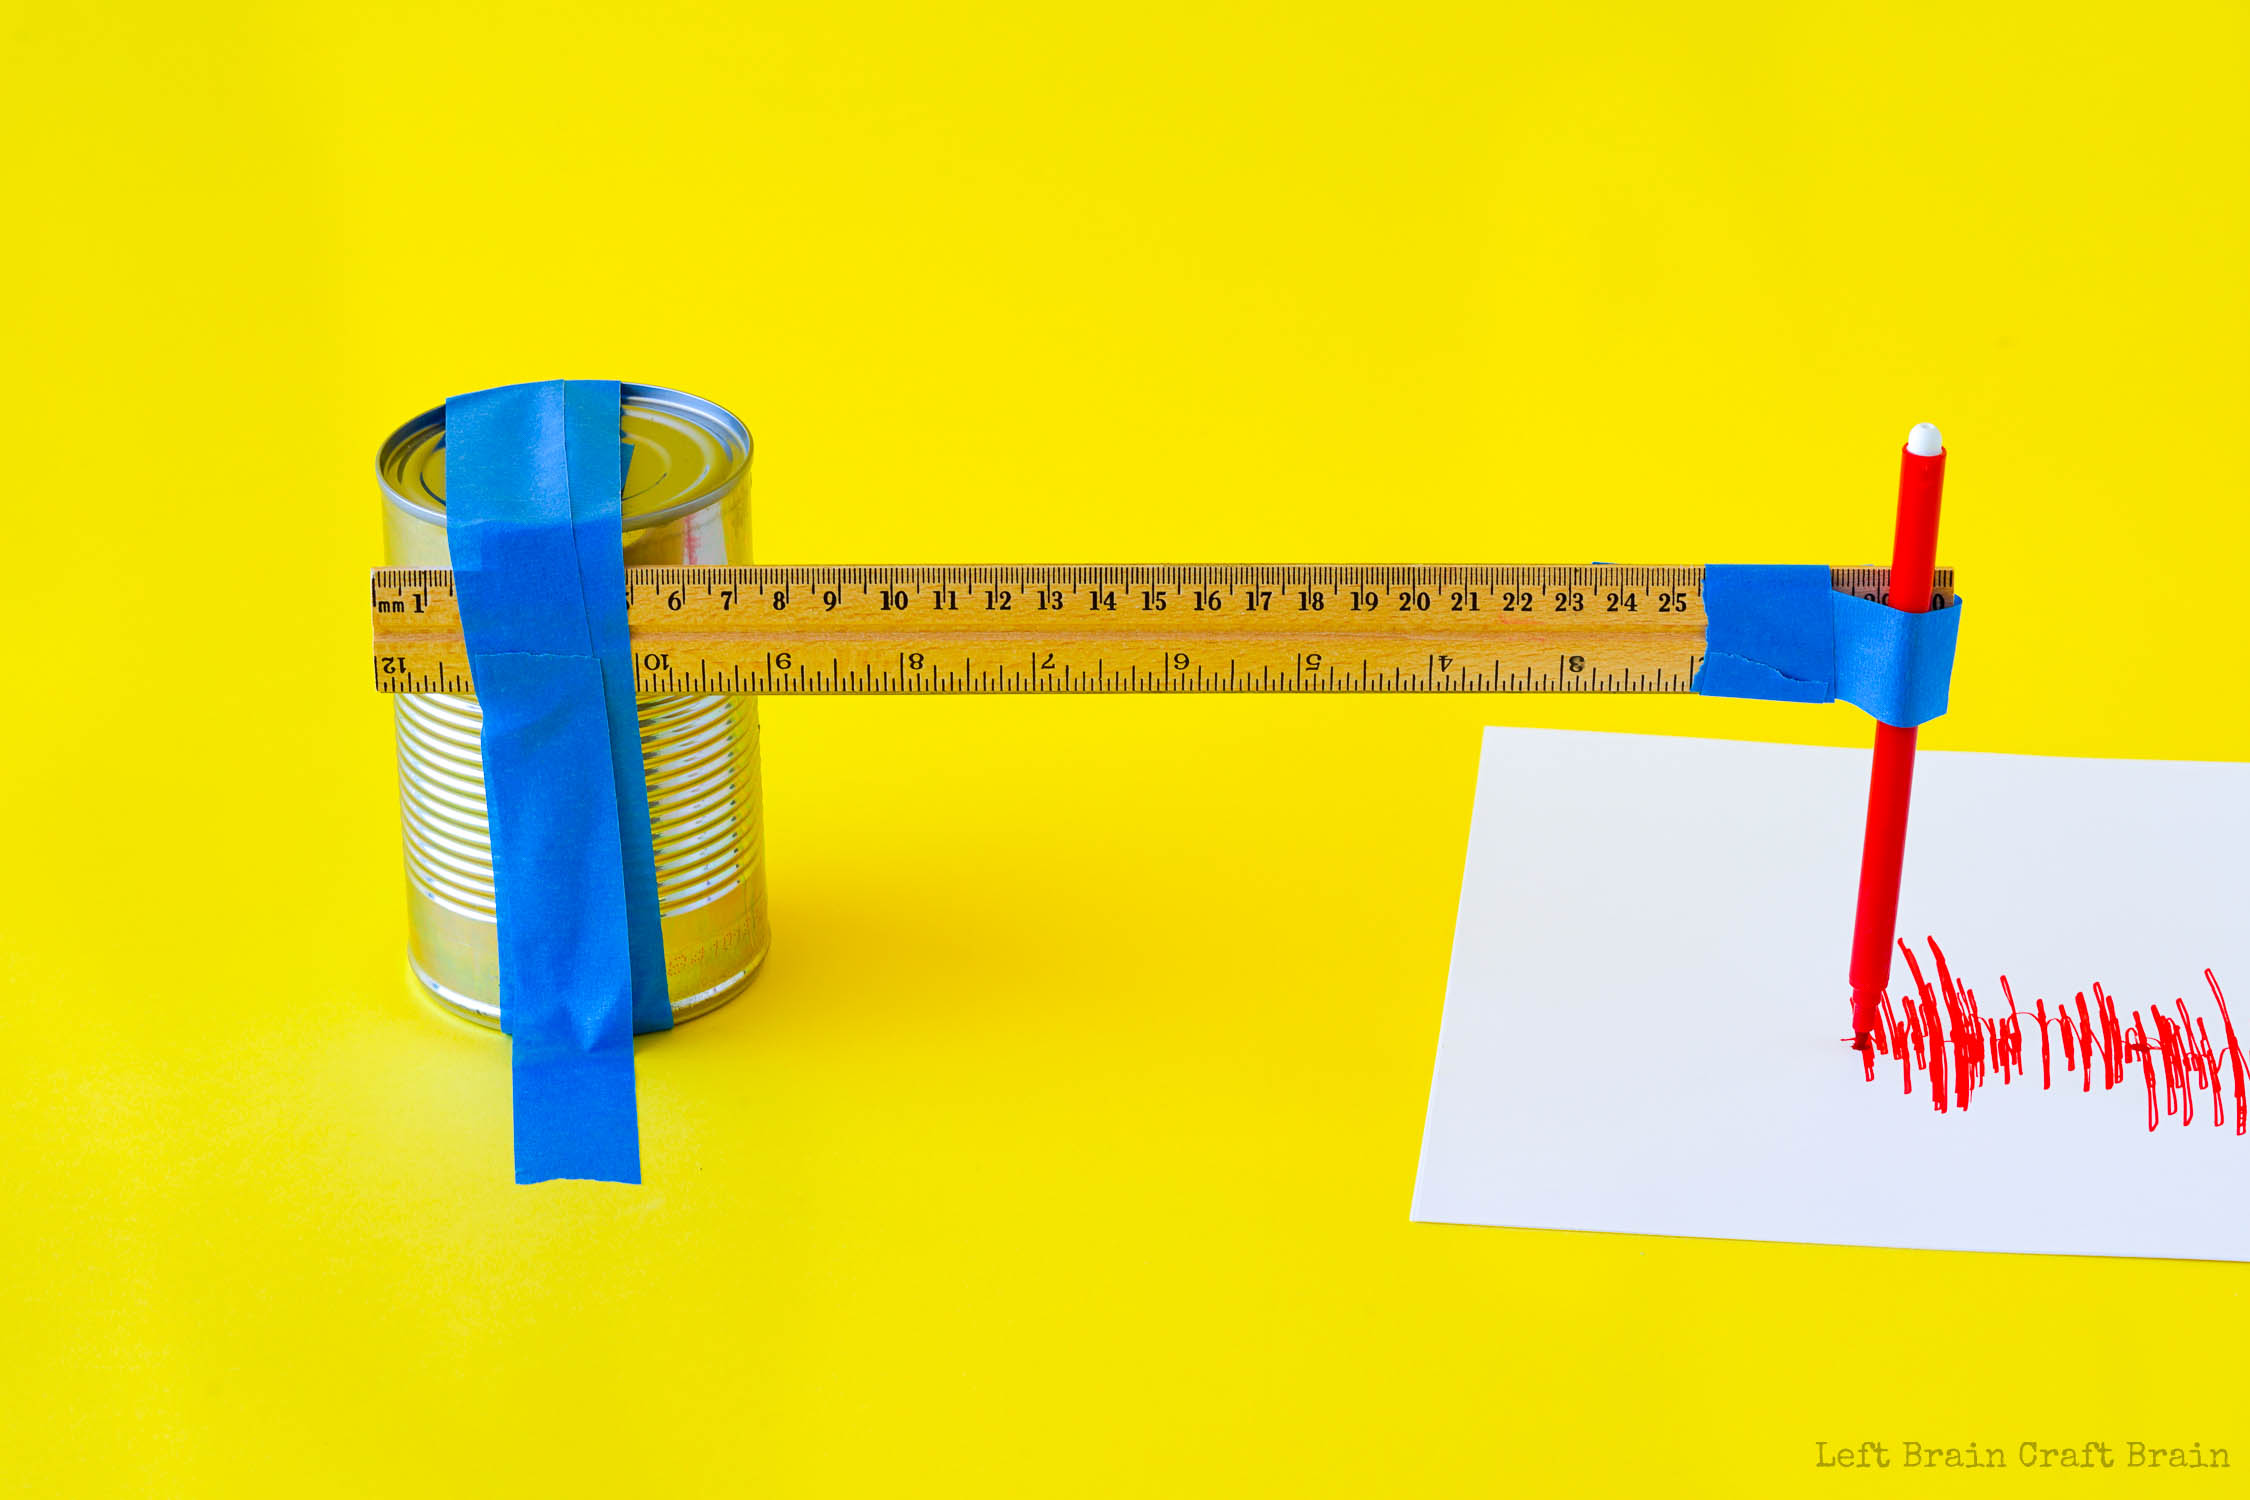
- Place one end of a ruler on the side of a full metal food can towards the top of the can. Tape securely. The ruler should still be able to angle away from the can but not shift up or down.

- Place a piece of paper down on the table for the next step as it will make marks with the marker. Tape a thin marker to the end of the ruler away from the can. Align the marker so that it is straight up and down and the tip of the marker (with the cap off) hits the surface of the table but can still move when shaken.
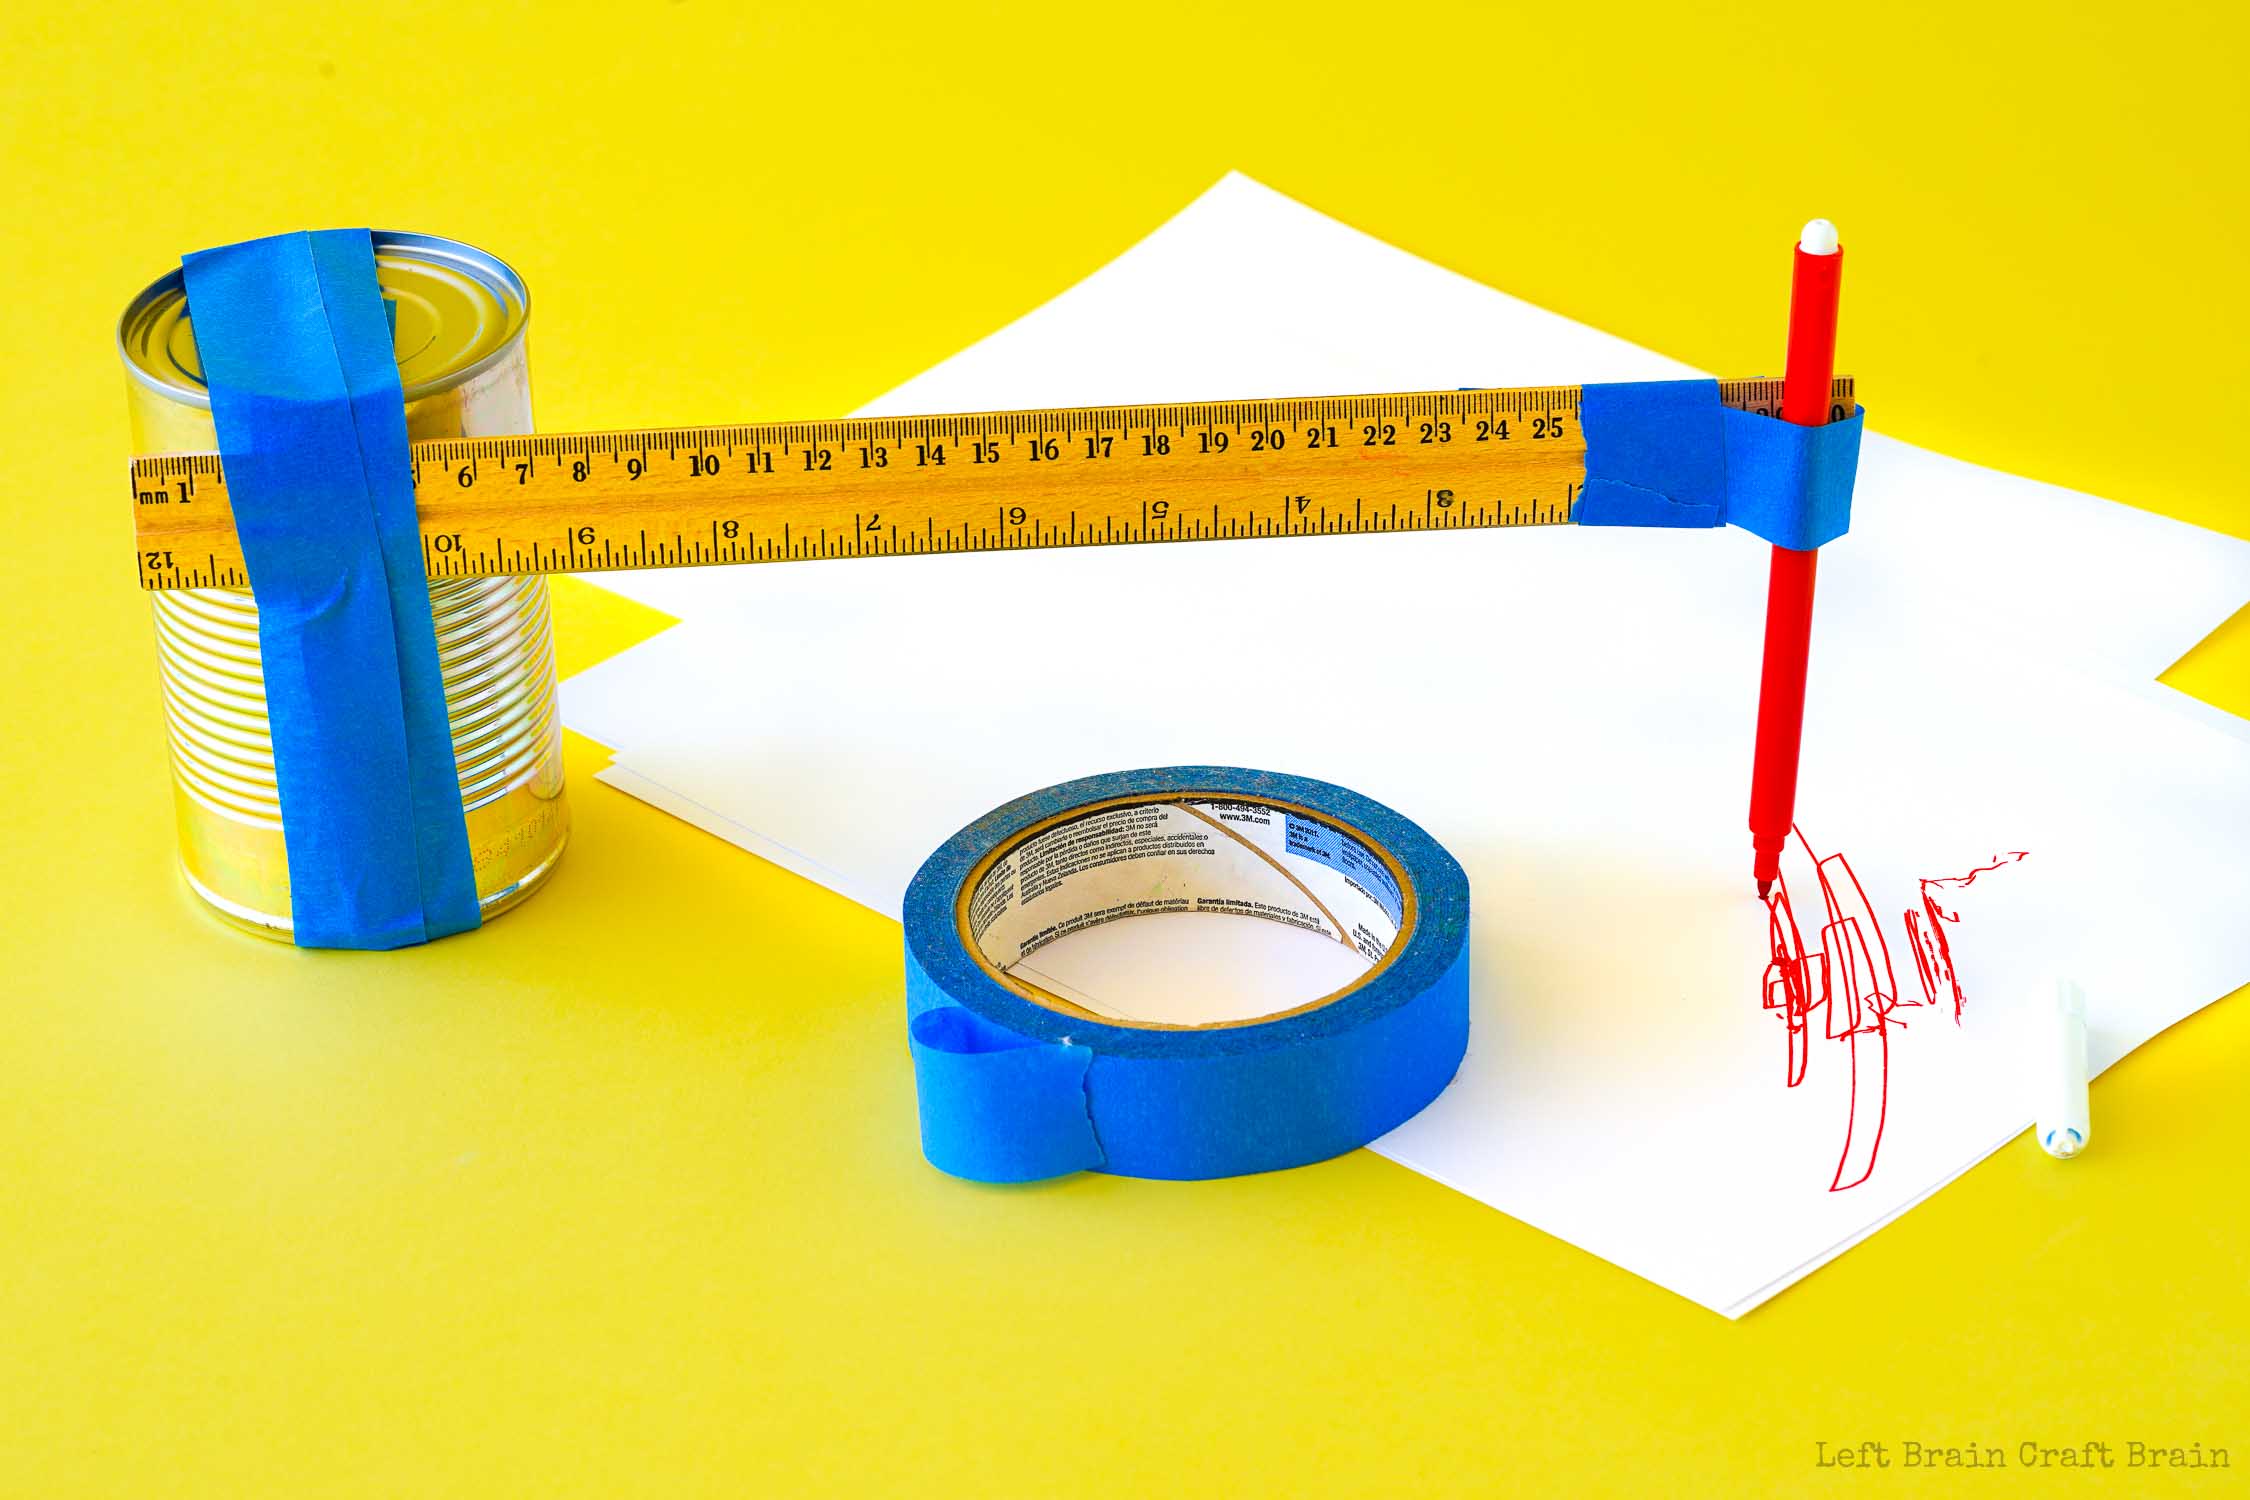
- Place the can on a table and tape it to the surface with masking tape (do not use clear tape on tables!).
How to Record Vibrations with the Seismograph
- Place a fresh piece of paper underneath the marker tip with the majority of the paper to the left of the marker.
- Give the table a shake. What happens to the marker?
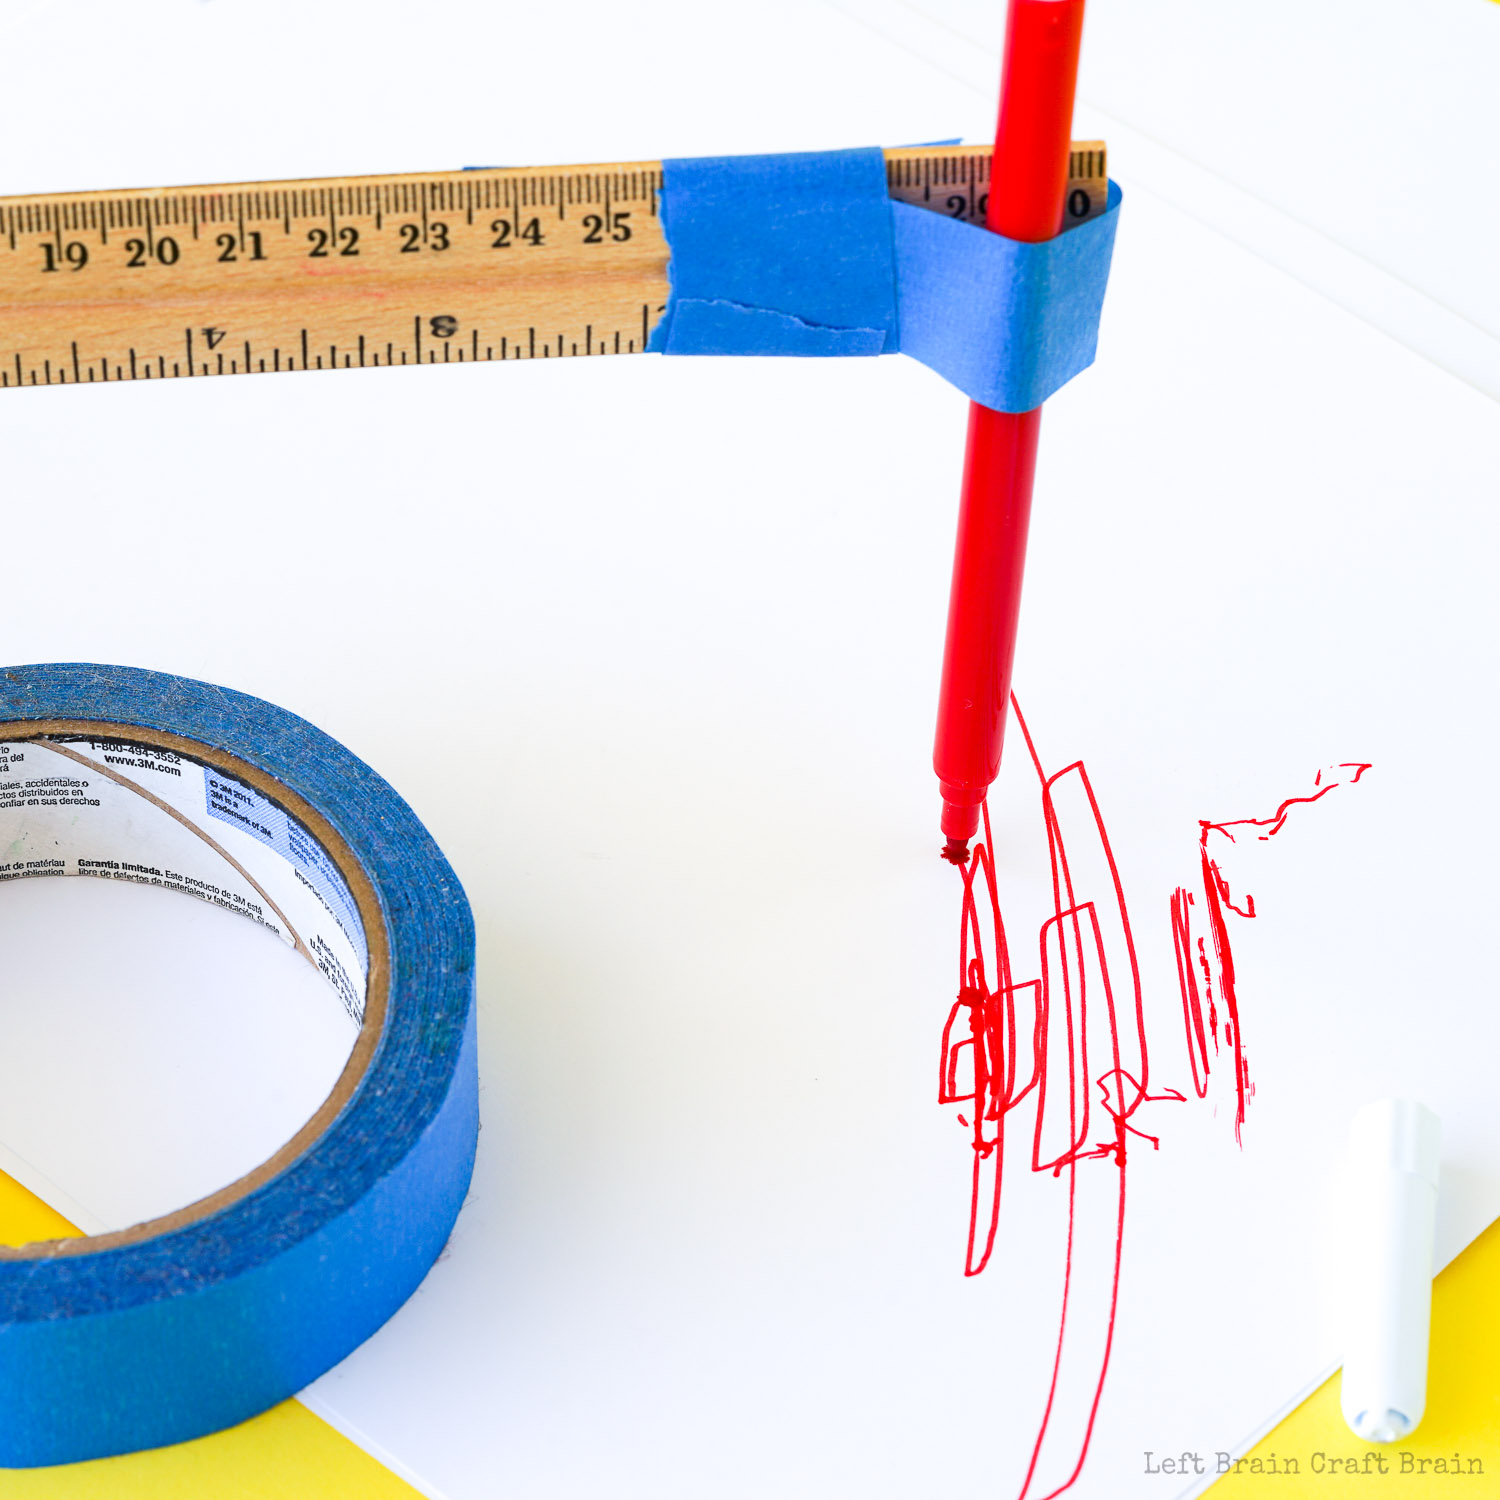
- Now give the table and/or can a shake back and forth while pulling the paper slowly to the right. Try different levels of shaking. Small vibrations will make small lines while large vibrations will make larger lines, just like seismographs recording real earthquake movement.
More Hands-On STEAM Fun for Kids
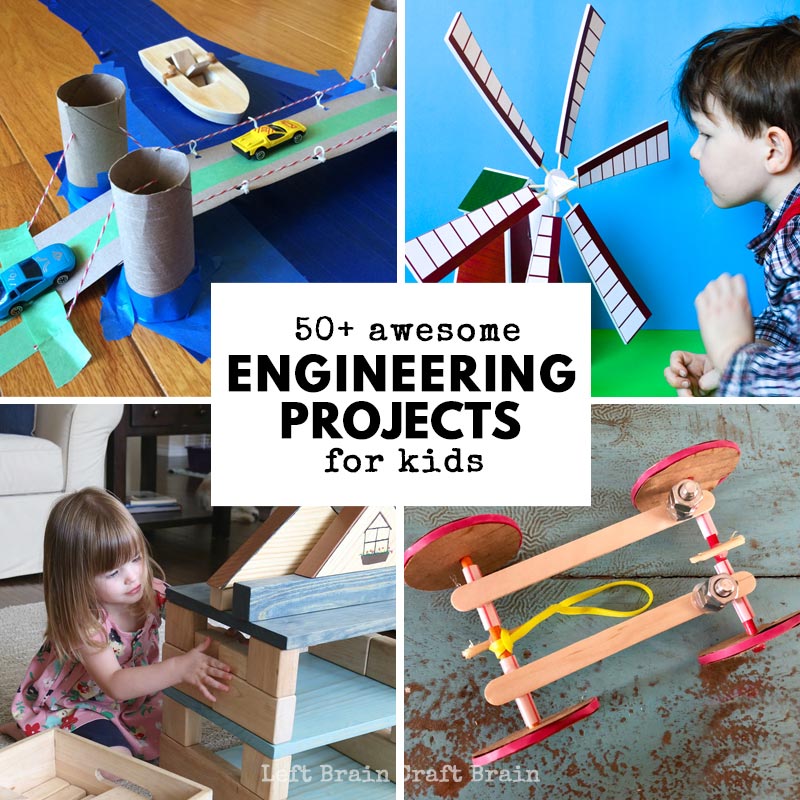
Do the kids love to build? Check out this mega list of 50+ Awesome Engineering Projects for Kids!
Looking for some more STEAM inspiration that you can use right now? Instant gratification style? Check out STEAM Explorers!! The coolest creative experience for kids is here! It's a digital book of the month club filled with tons of fun stuff for the kids to do and learn. All engineer, teacher, and mom-approved. And most definitely KID APPROVED!

What’s included?
- A monthly digital magazine with cool themes that are fun to read
- Hands-on, exciting projects the kids will love.
- Science, tech, engineering, art, and math learning YOU’LL love.
- Delicious recipes the kids can make.
- Fun printables and games
Get ready to have some festive fun in this month's Space issue!
Join us as we explore the weather all around us for the STEAM Explorers Weather EBook Unit Study!! Kids will love creating weather in a jar, capturing the daily forecast in an art journal, and becoming a meteorologist with DIY tools. You'll love the helpful standards-based learning, printables, and tools that make STEAM (science, technology, engineering, art, & math) exploration easy!
We’ve split the STEAM Explorers Space issue into four weekly themes:
WEEK 1: Earth & Moon
WEEK 2: Space Travel
WEEK 3: Solar System
WEEK 4: Starry Skies