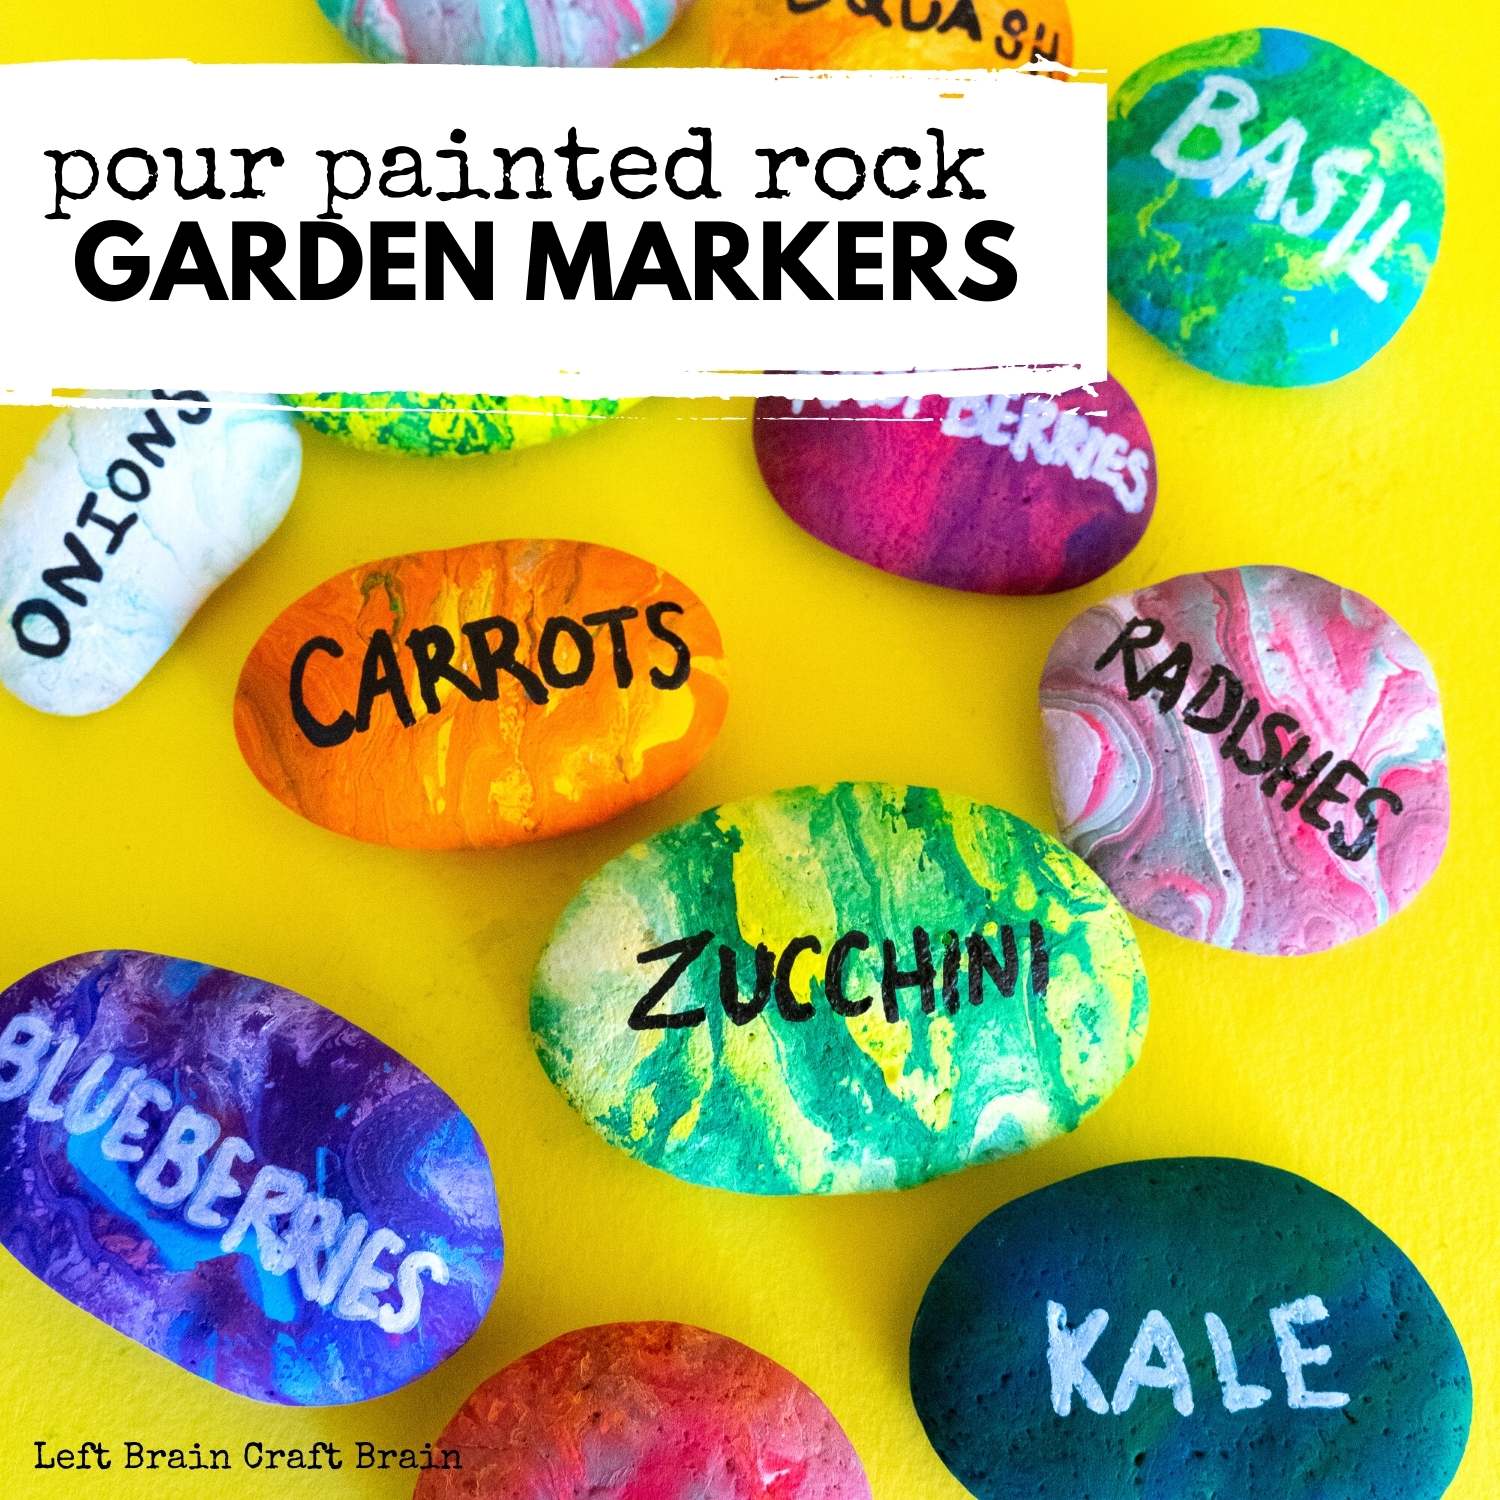
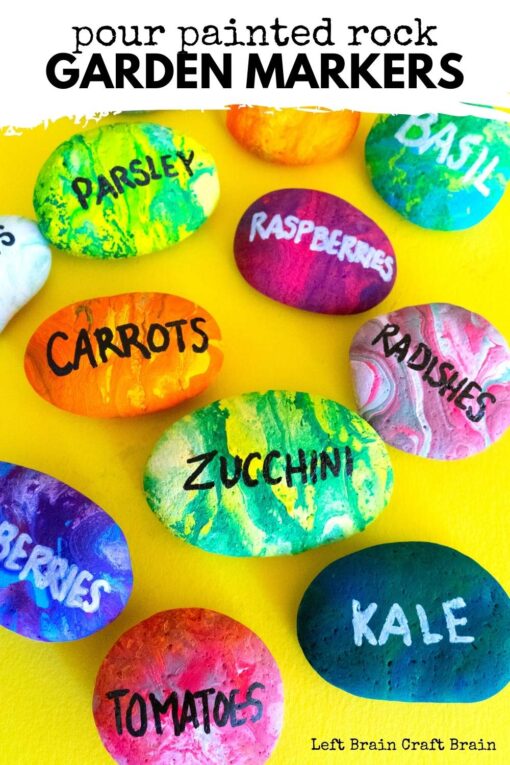
Keep track of what you’re growing with a fun art project for your garden! These pour painted rocks garden markers are a gorgeous way to add a pop of color and creativity in your veggie bed. Simply layer paint in a cup, pour, and then label them with whatever you’re growing and you have a perfect gift for the gardener in your life. This project is a sneak peek into our STEAM Explorers Garden Ebook!
What is Pour Painting?
Pour painting is an amazing type of process art where you pour paint of different colors onto your art surface. First, you layer different colors of paint in a cup, a little bit at a time, without mixing. Then you slowly pour the paint over the art surfact. The gorgeous swirled patterns on these garden markers and other pour painted projects happens because of gravity! Gravity is a force that attracts a body towards the center of the Earth. Gravity pulls the paint towards the rock and the colors swirl as they hit the surface.
Check out some of our painted rock garden markers!
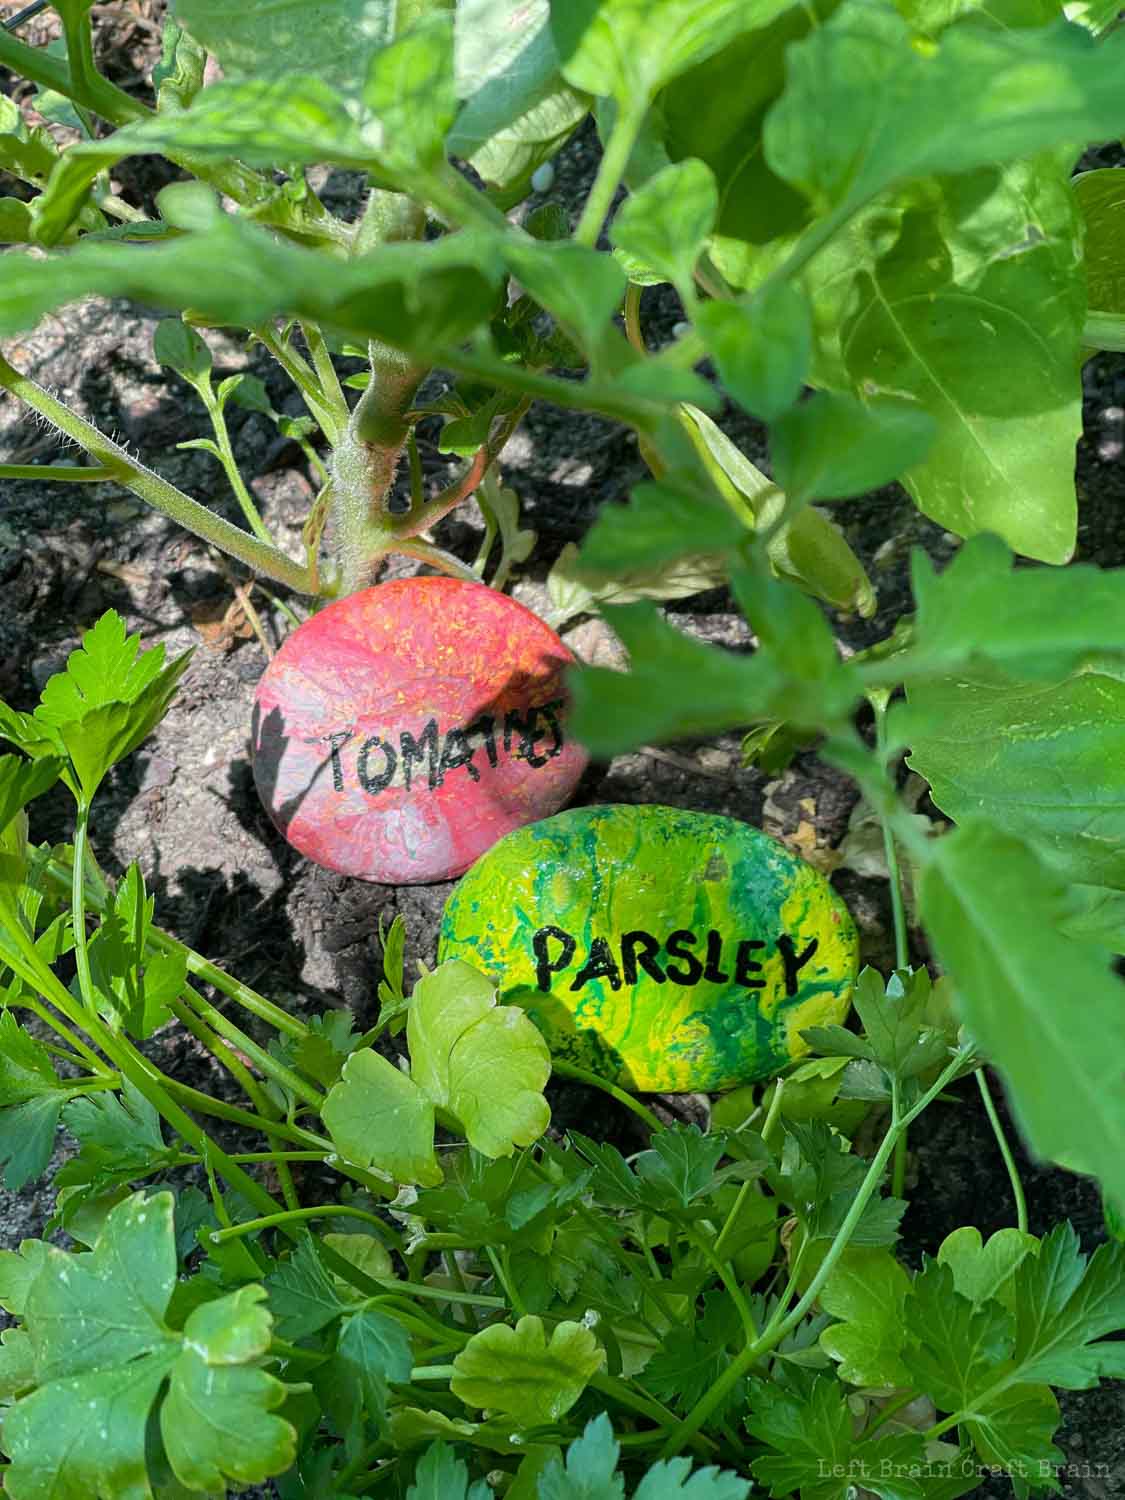
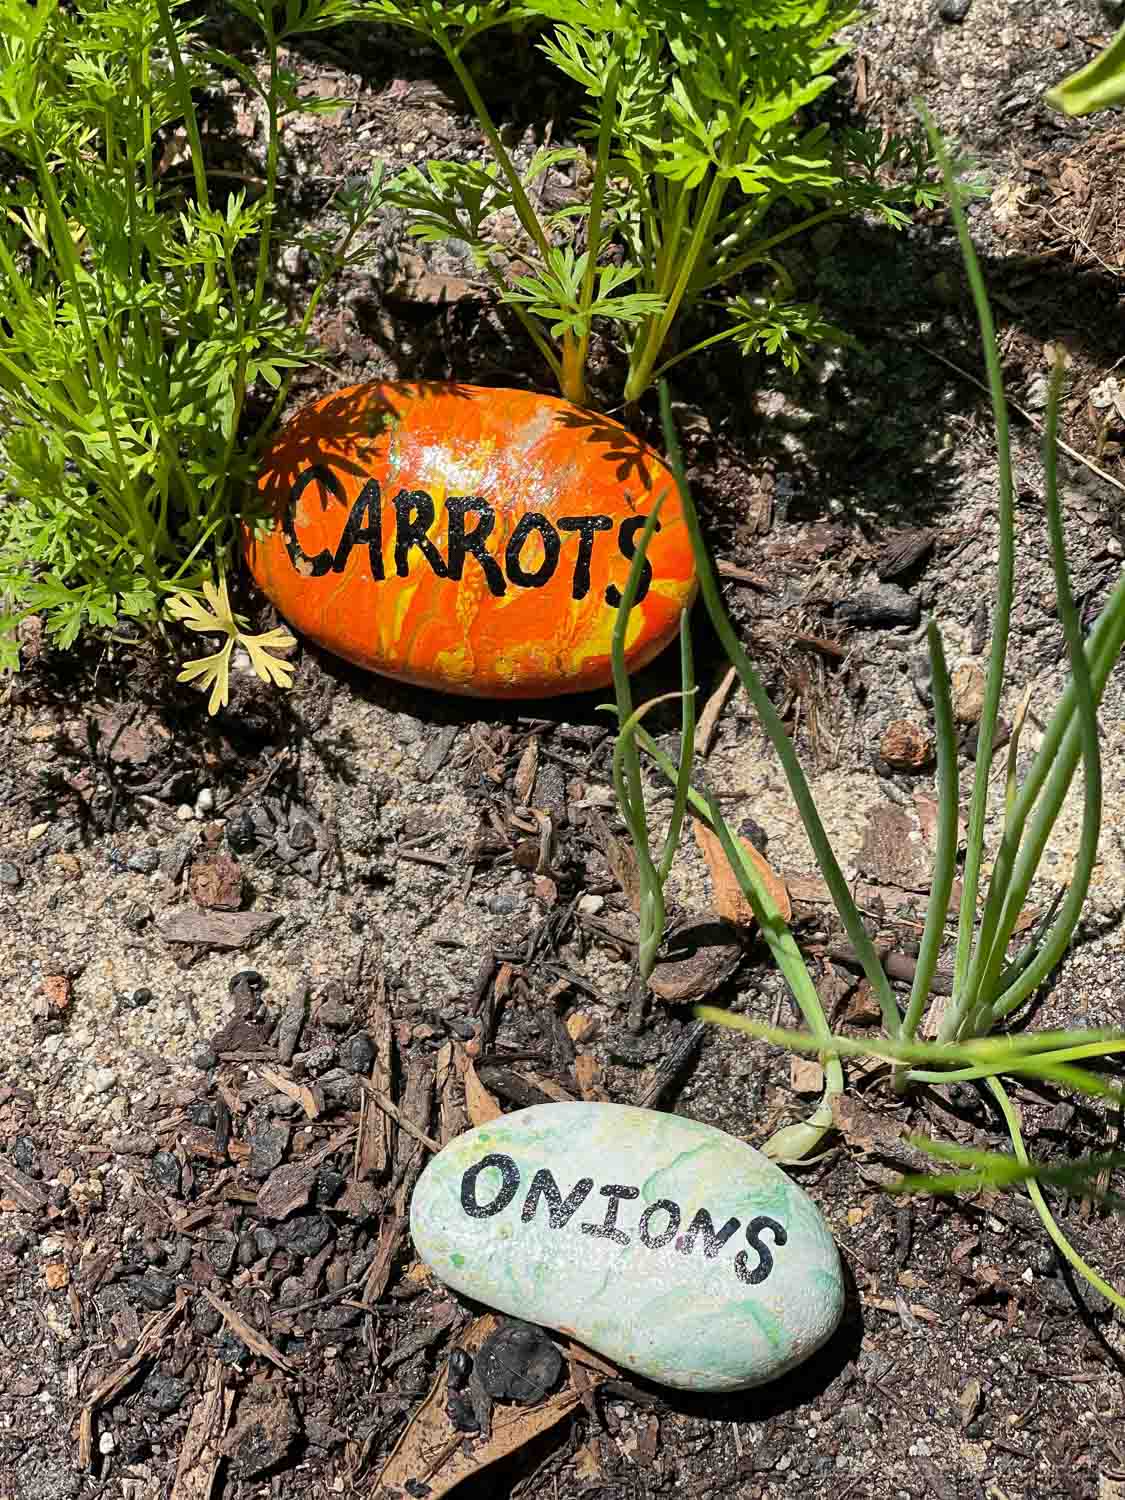
We’ve got a brand new garden this year… We tried these garden grow bags and it’s the best garden we’ve had yet. We’ve been able to keep the animals away and our tomatoes and snap peas are growing tall. If only our strawberry plants put out more than a few berries… The rocks have come in handy right now as the plants are little and it’s not as obvious what they are. Check out how we’re showcasing what’s growing.

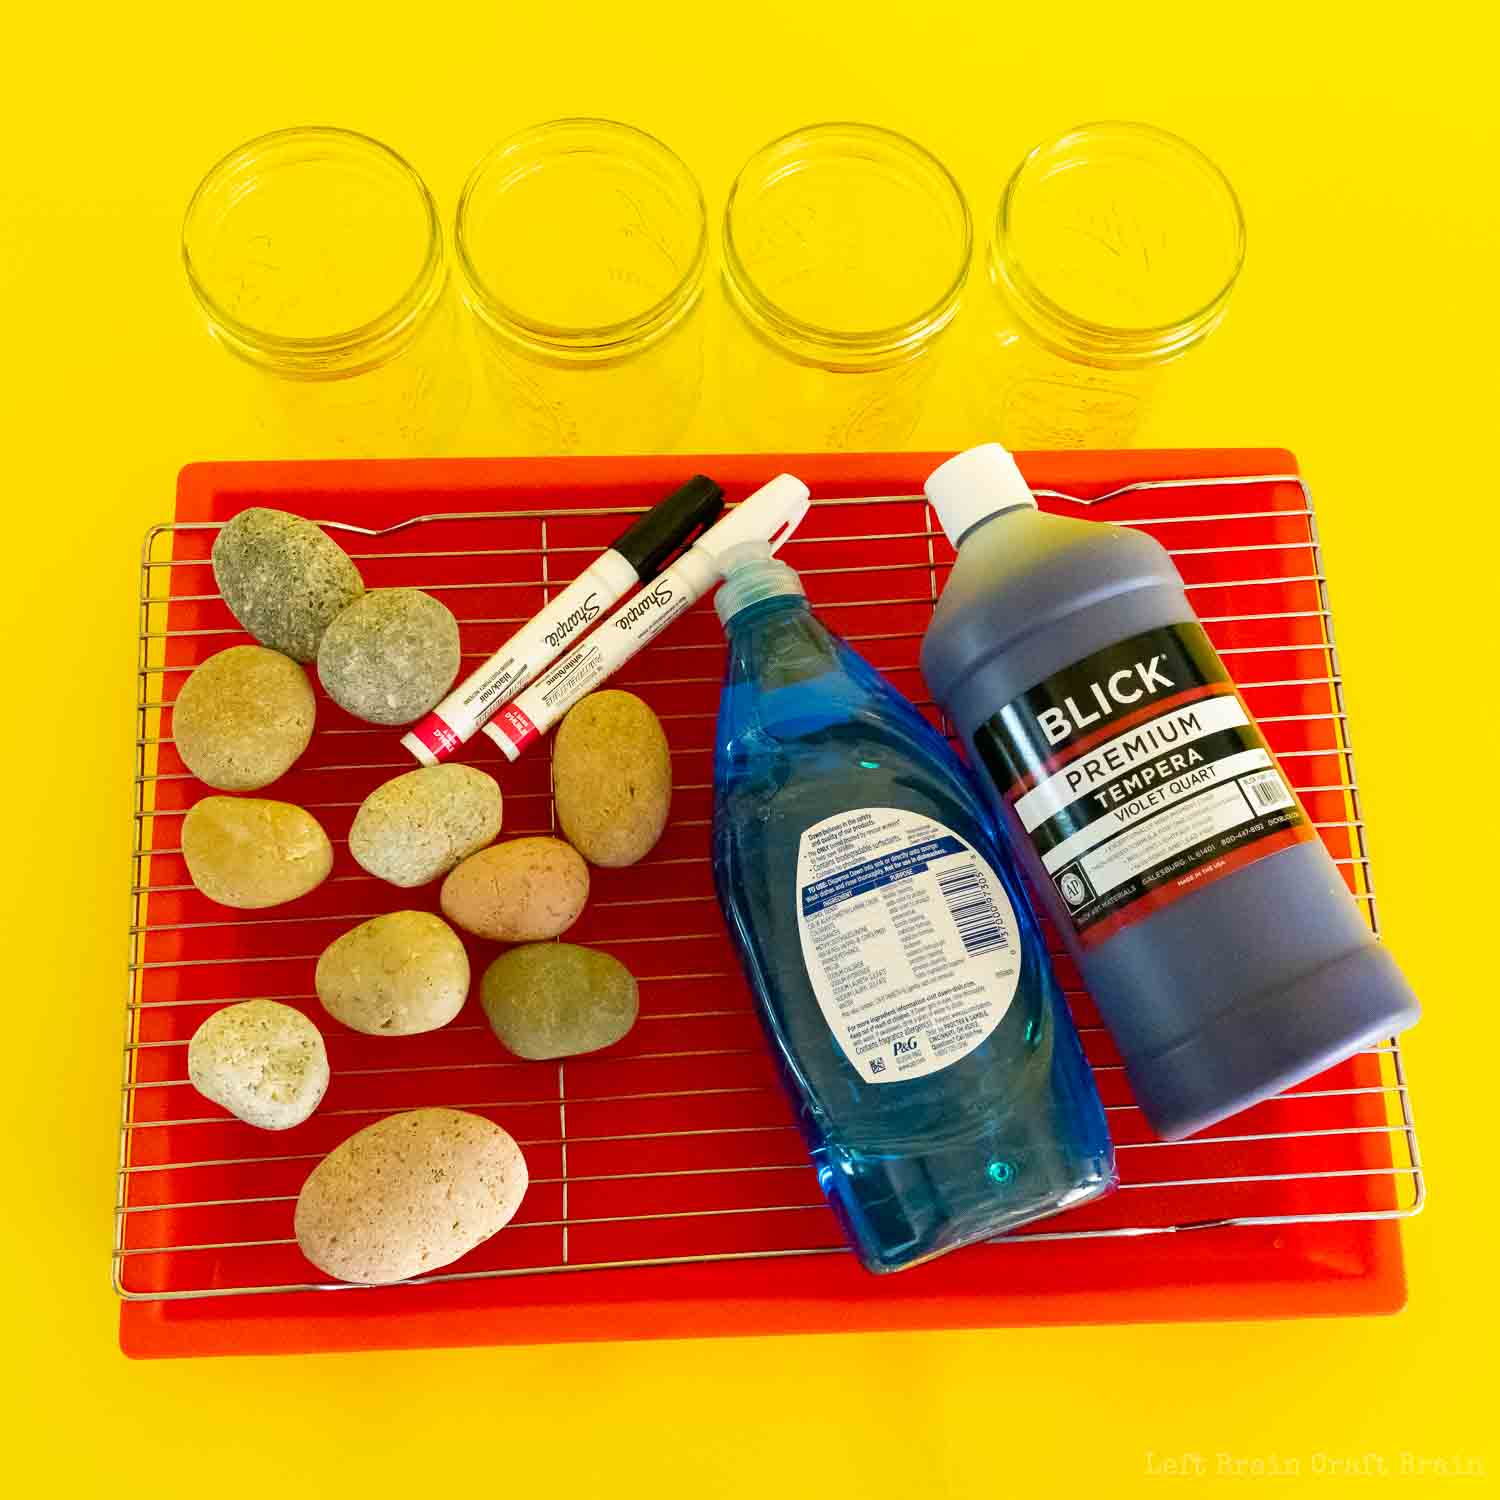
Pour Painted Rock Garden Markers Supplies Needed
For these rocks you’ll need some acrylic or tempera paint and some smooth rocks. Don’t use washable paint for these because they’re going to be hanging out in the garden. You’ll also want some trays and wire racks to contain the mess.
- Rocks (smooth, flat rocks work best)
- Tempera or acrylic paint
- Water
- Dishsoap
- Popsicle sticks
- Paper cups or jars
- Tray
- Wire rack
- Paint markers (or paint brushes)
- Spray or brush on sealant (outdoor versions last the longest)
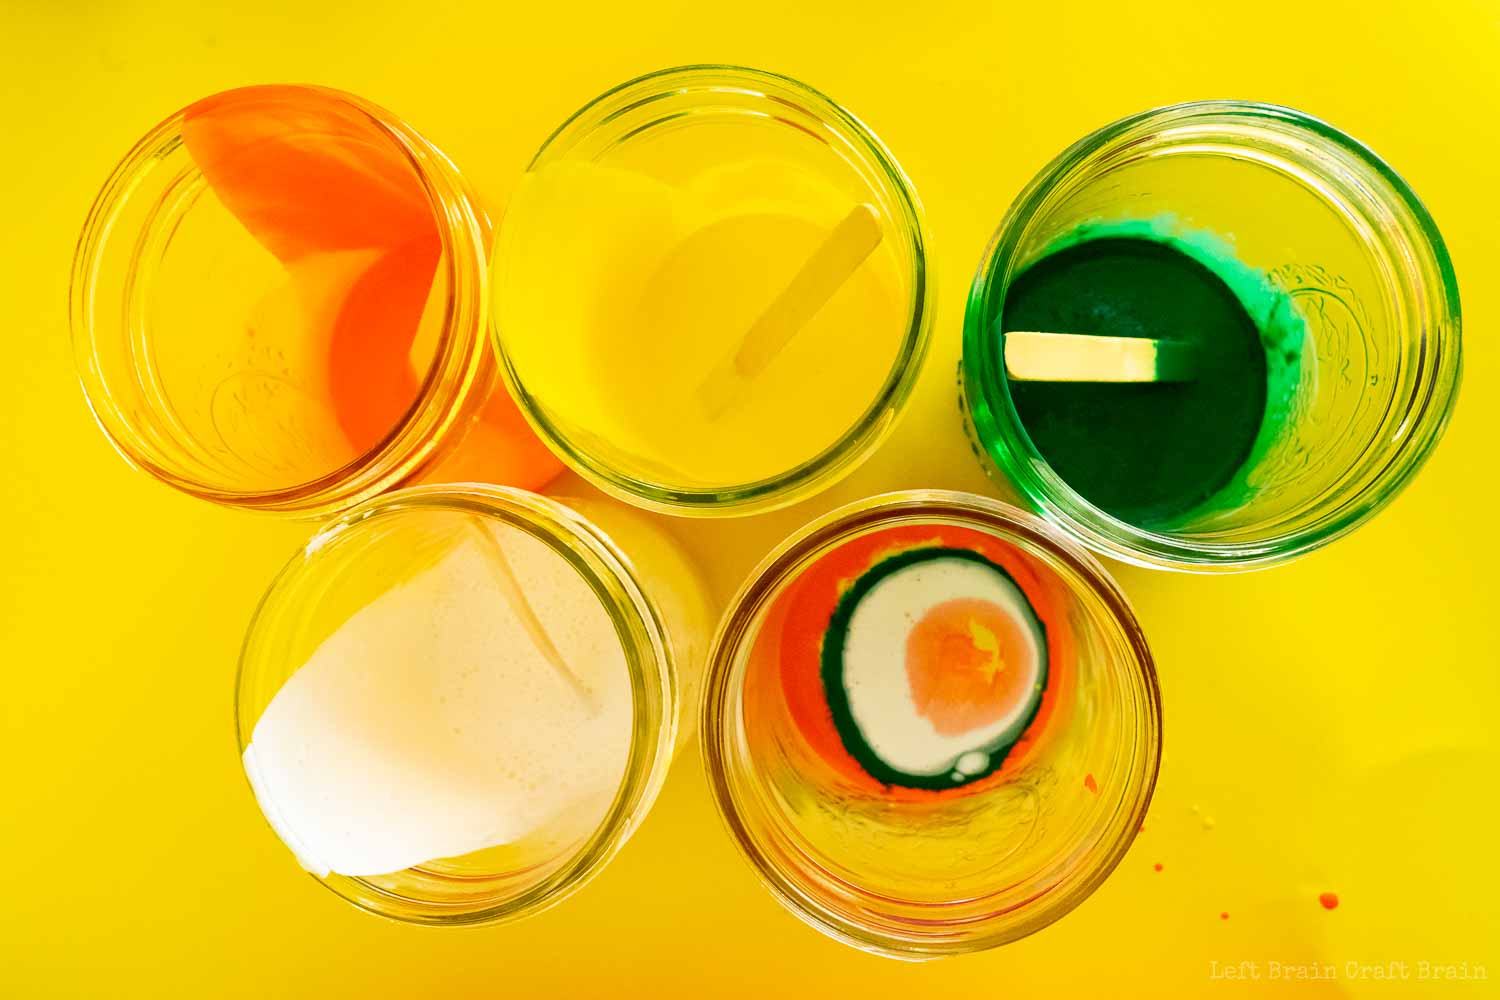
How to Prepare the Paint for Pour Painted Rocks
- Make a mixture of 2 cups water and 3 drops of dishsoap.
- In a separate cup for each color, pour about 1/4 cup of paint. Add some of the water/soap mixture, 1 tablespoon at a time and stir. Keep adding the water/soap mixture until the paint is approximately the consistency of cream.

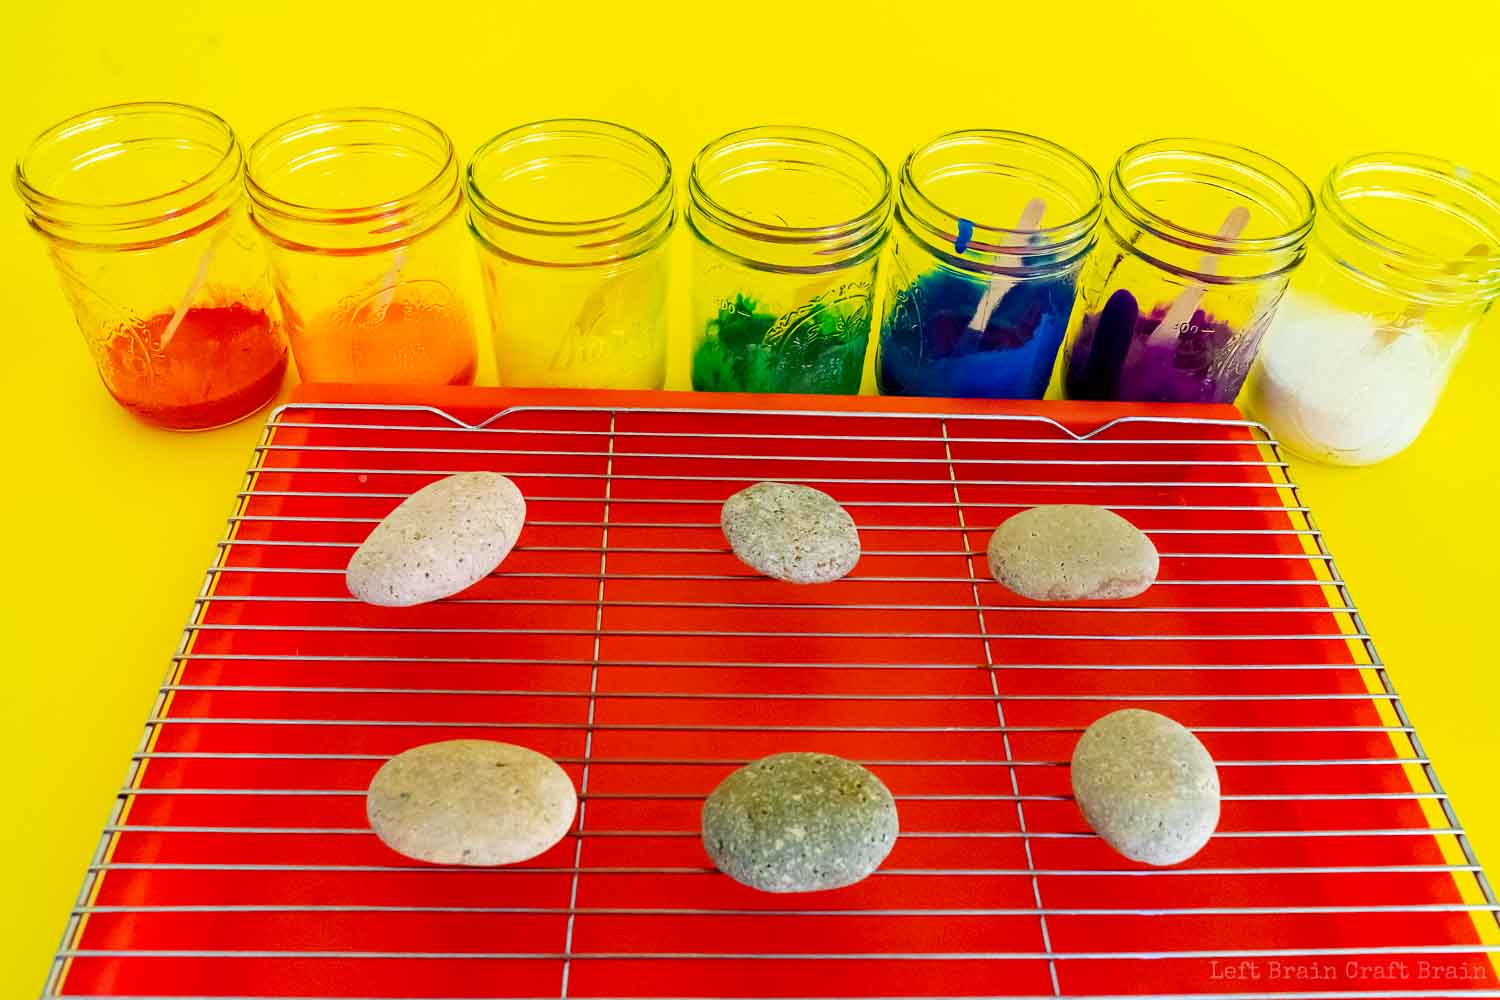
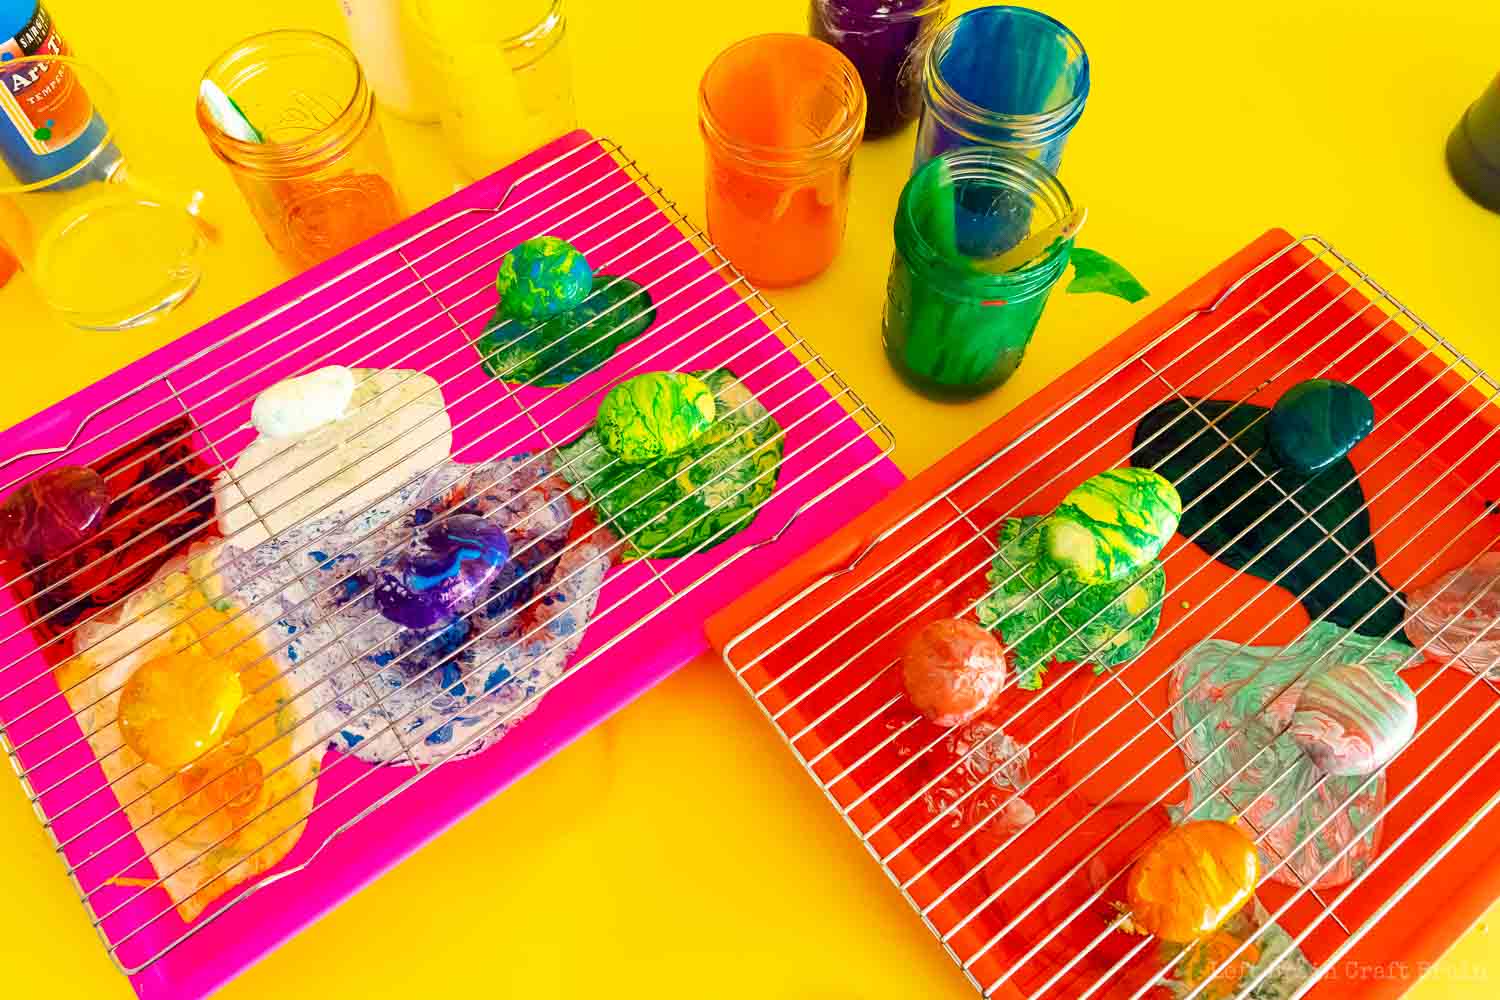
Pour Paint the Rocks
Pouring the paint onto the rocks is definitely the most fun part of this process. You never know what kind of swirly pattern you will get! Check out some of our pours in the video below.
- Grab another cup and alternate small amounts of each desired color until the cup is about 1/4 full. (Do not mix!). You’ll definitely want to try a bunch of color combinations. You can think about what you’re growing this year and make the colors to match. Or go for wild rainbows or any color combinations you like.
- Place your rocks on a wire rack over a tray (this gets messy!).
- Pour paint over top of the rocks. Here are a few of our favorites.
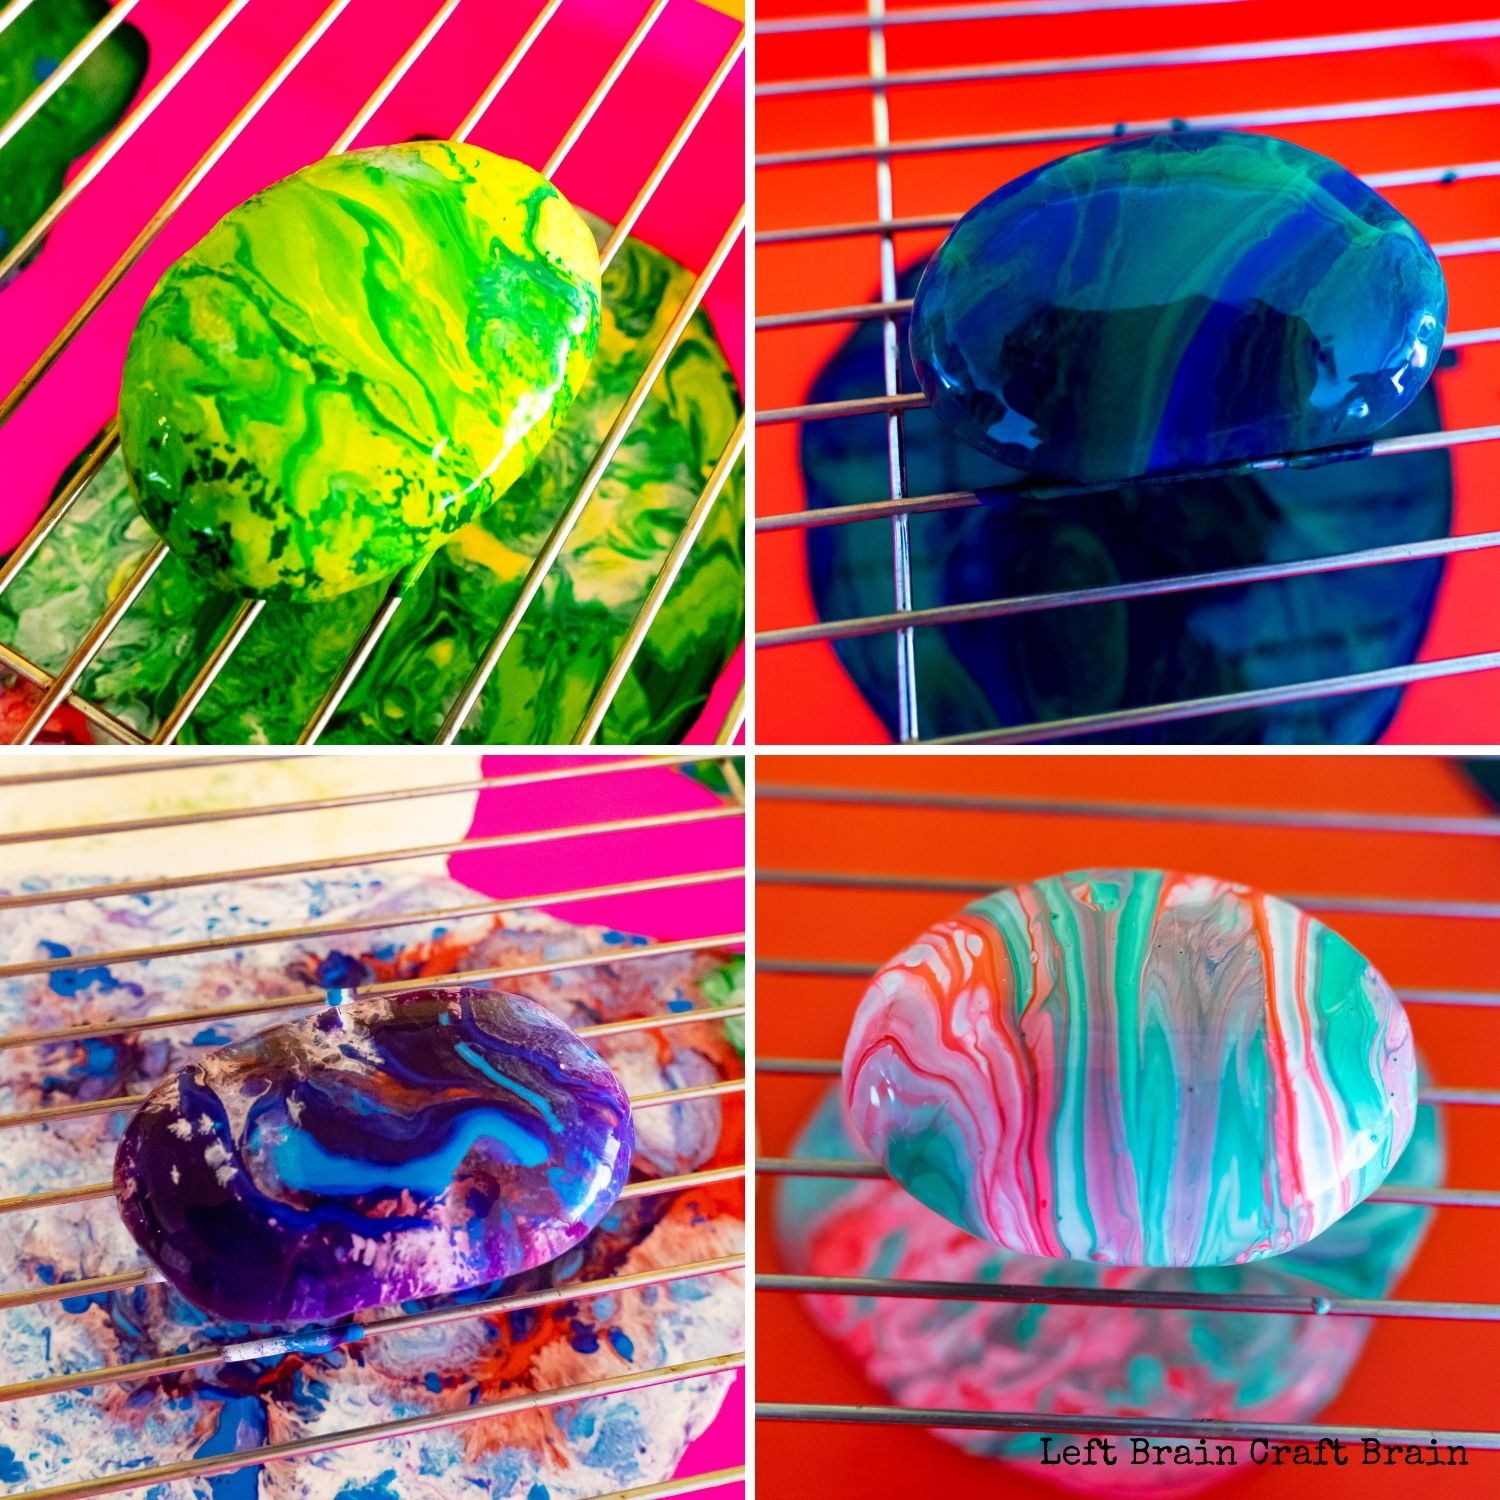
- Let the rocks dry before moving them off the tray (approximately 12 hours or overnight).
Label and Seal the Pour Painted Rock Garden Markers
- Once the paint is dry, label each rock with the plant you are growing. Paint markers work well but if you don’t have those, you can label them with a small paintbrush and non-diluted paint.
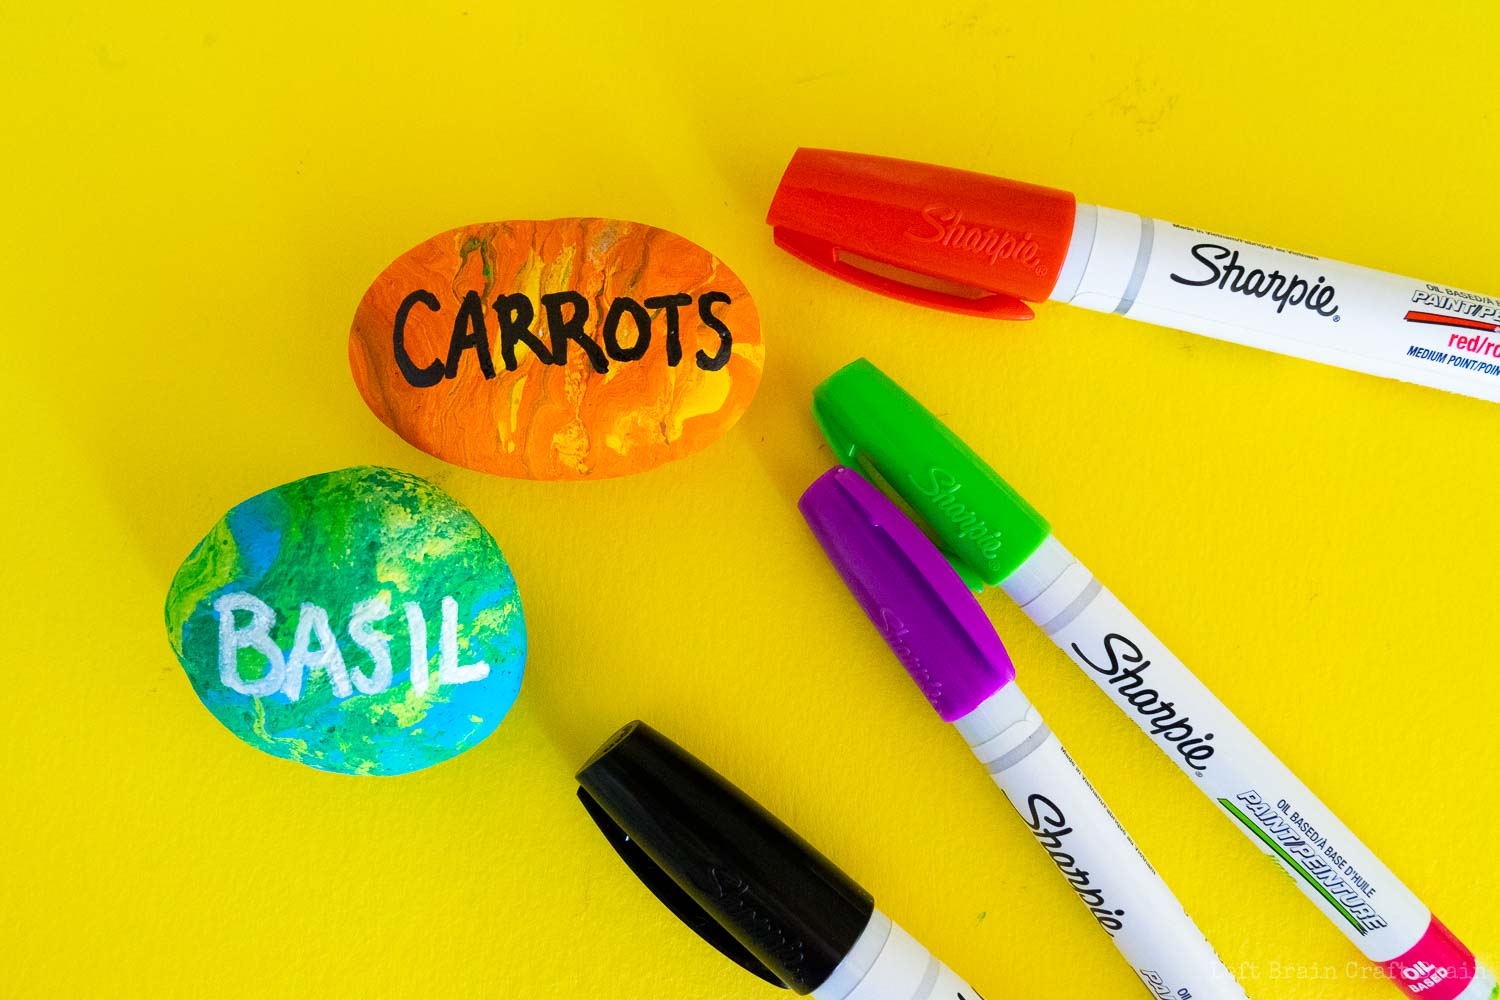
- Let the labels dry completely and then seal with spray or brush-on sealant.

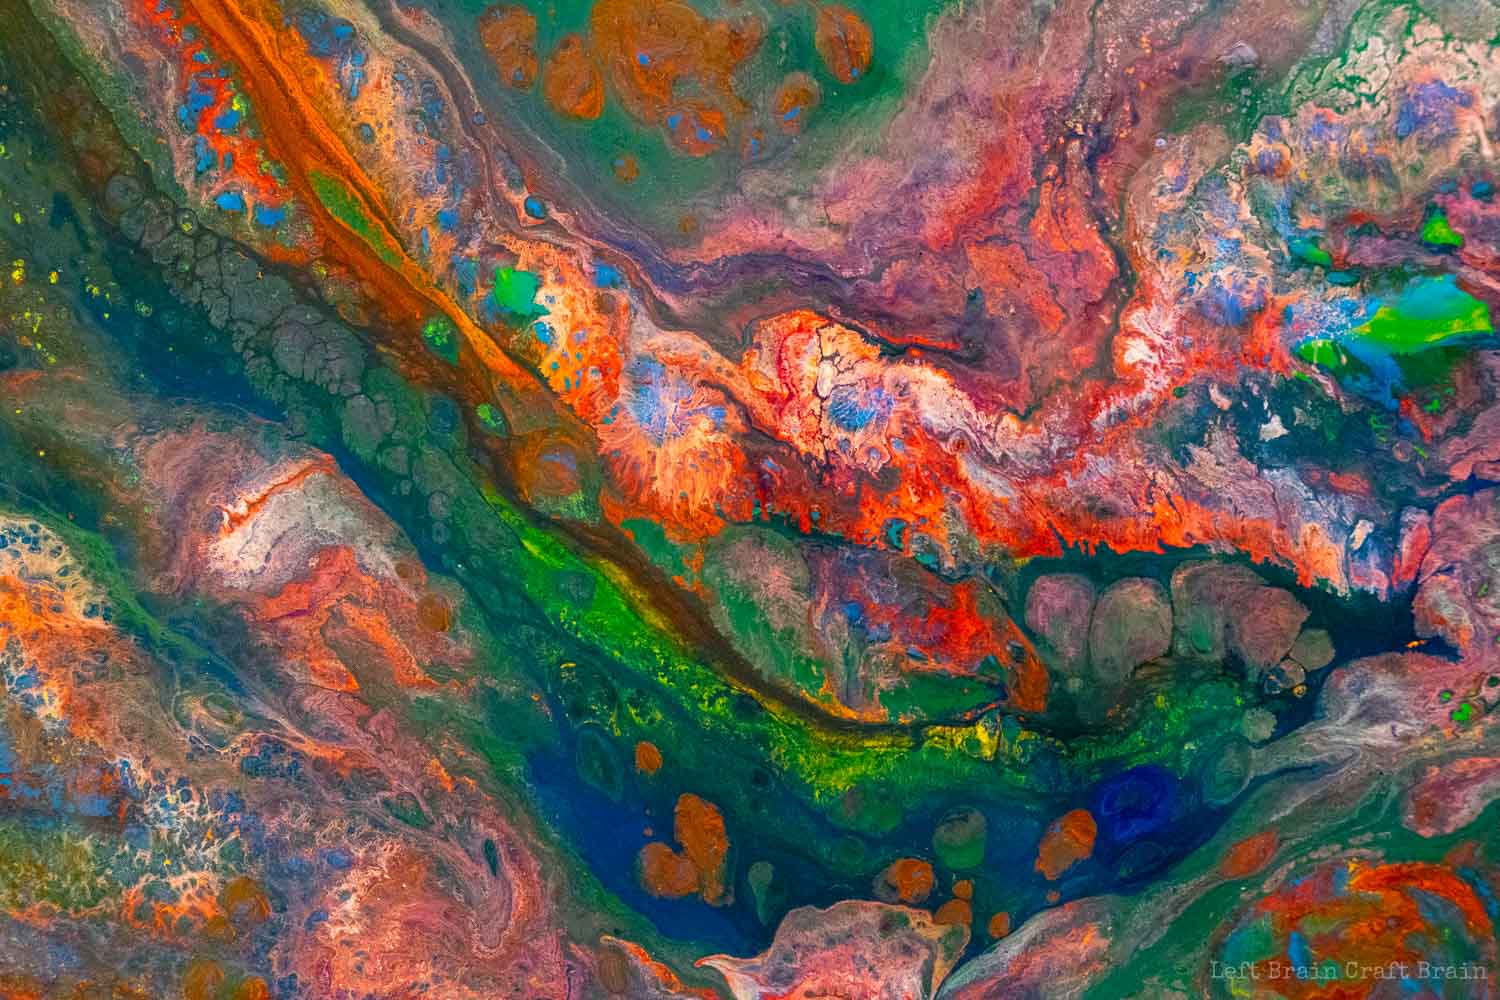
Bonus Project: Pour Painted Art
Pour any extra paint into a single cup and pour onto a canvas or piece of cardboard. Tilt to spread the paint and cover the surface.
More Garden Fun for Families
Looking for some more STEAM inspiration that you can use right now? Instant gratification style? Check out STEAM Explorers!! The coolest creative experience for kids is here! It's a digital book of the month club filled with tons of fun stuff for the kids to do and learn. All engineer, teacher, and mom-approved. And most definitely KID APPROVED!

What’s included?
- A monthly digital magazine with cool themes that are fun to read
- Hands-on, exciting projects the kids will love.
- Science, tech, engineering, art, and math learning YOU’LL love.
- Delicious recipes the kids can make.
- Fun printables and games
Get ready to have some festive fun in this month's Space issue!
Join us as we explore the weather all around us for the STEAM Explorers Weather EBook Unit Study!! Kids will love creating weather in a jar, capturing the daily forecast in an art journal, and becoming a meteorologist with DIY tools. You'll love the helpful standards-based learning, printables, and tools that make STEAM (science, technology, engineering, art, & math) exploration easy!
We’ve split the STEAM Explorers Space issue into four weekly themes:
WEEK 1: Earth & Moon
WEEK 2: Space Travel
WEEK 3: Solar System
WEEK 4: Starry Skies